The workflow
This page explains the workflow you follow in using Data Integration to move and manipulate your data.
Overview
Tip: Before starting the workflow, you should familiarize yourself with the documentation for the agents you intend to use, to learn about unique connection requirements and any other details specific to the agent. For example, the Sage Intacct agent has integration steps that must be performed before any steps in the workflow below.
Using Data Integration essentially consists of the following phases:
- Set up your resources.
- Add the resources to jobs
- Run the jobs
These phases translate into the steps of the Data Integration workflow:
-
All sites are added in the same way, regardless of your sources and destinations.
-
All agents are added in the same way, regardless of their type.
-
Connections differ based on their agent type.
-
Queries differ based on their agent type, and some agents don't use queries.
-
Extracting data is done using jobs; a job combines the resources you created in the setup phase.
-
You have the choice of running jobs either from Data Integration or from within your Prophix application.
-
In the Job Log you can see the status of your jobs and you can cancel a running job.
Resources
Before you can transfer data, in Data Integration you must define the resources needed for your intended sources and destinations.
These resources are as follows:
- Site – defines a group of agents that share the same GUID.
- Agent – defines the source of and/or the destination for the data.
- Connection – defines where the source is located.
- Query – defines what data is to be retrieved from the source.
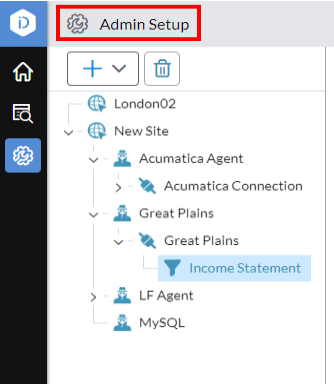
Resource structure
In Data Integration, the resources you define appear in a tree hierarchy: sites always comprise the first level; agents can only come beneath sites, connections come beneath agents, and queries beneath connections. This means you must add a site before you can add its agents, and an agent must exist before you can add its connections, and so on.
Once you have the necessary resources defined for your source and destination, you can create jobs.
1. Add a site
Adding a site is always done the same way, regardless of the agent type you plan to use.
- In the navigation panel, select Admin Setup.
- Click > Add Site.
- Site Name must be unique. Up to 40 characters.
-
For Site ID copy and paste the controller's GUID from your GUIDS.json.
- Click Save.
Delete a site (or any other element)
- Select the site or other element.
-
Click .
Caution: Any sub-elements are deleted as well.
2. Add an agent
Adding an agent is done the same way for all agent types.
Tip: To learn about the various agents, see the Agents section.
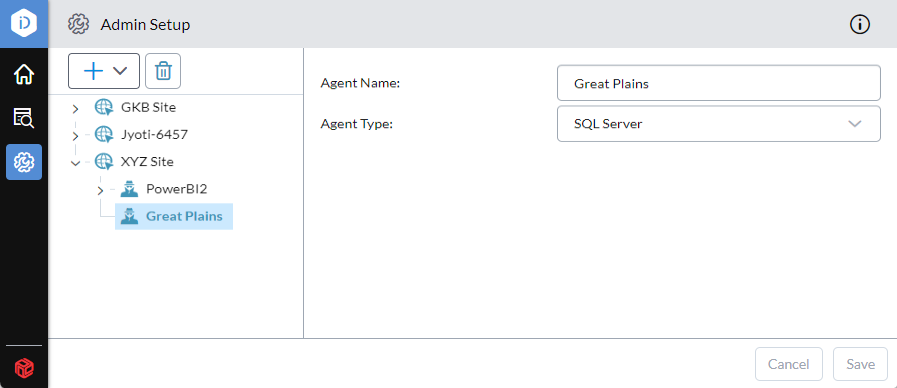
Example agent profile:
- In the navigation panel, select Admin Setup.
- Select a site and click > Add Agent.
- Agent Name must be unique. Up to 40 characters.
- Select an Agent Type (cannot be changed once saved).
- Click Save.
3. Add a connection
A connection defines:
- where the source is located
- the credentials required to connect to the source
Connections differ based on agent type.
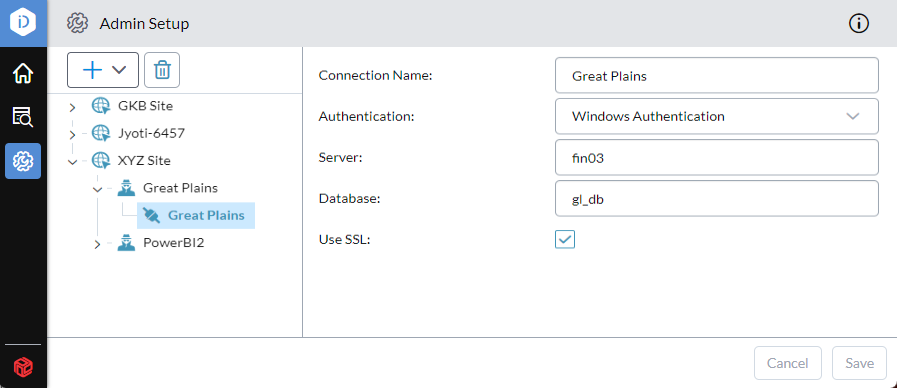
Example connection profile:
- In the navigation panel, select Admin Setup.
- Select an agent or peer connection, and click > Add Connection.
- Connection Name must be unique. Up to 40 characters.
-
Complete the remaining boxes.
Note:The Agent Type determines the connection properties that appear.
To learn how to define the connection, see the page for your chosen agent type:
Note: If you want to save to files, you need to set up the Local File agent and its connection.
- Click Save.
4. Add a query
Only the agents listed here use queries. To learn how to add a query, use the following links:
- Acumatica
- Cash Management
- Dynamics 365 for Finance and Operations
- Financial Consolidation
- MySQL
- Netsuite
- ODBC/ODBC32
- Sage Intacct
- Script
- SQL Server
The following agent/connection types cannot have queries:
- Text
- Excel
- AWS S3 bucket
- SFTP
- Power BI (the connections can only be used as destinations, therefore a query is never defined)
5. Create a job
The actual data extraction is done using a job: a Data Integration object that contains one or more steps and tasks.
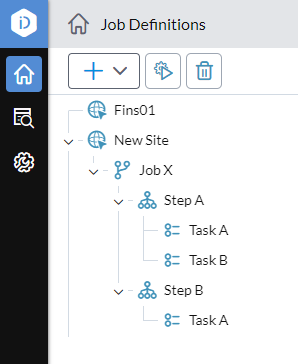
A step is a container for one or more tasks. A task combines a selection of the resources you created in the setup phase (the previous numbered steps above) and defines the sources and destinations.
Note: You can add multiple tasks under a single step. If multiple tasks are defined under a step, when the step runs all its tasks run in parallel.
- In the navigation panel, select Job Definitions.
- Select the appropriate site for the job.
-
Click > Add Job.
Tip: You can re-use an existing job (including its steps and tasks): right-click the job and select Copy; right-click any existing job and select Paste; the copy appears at the bottom of the site's job list.
- Name: The job name must be unique for the site. Up to 100 characters.
- Description: A note about the purpose of the job. (Optional)
- Verbose logging: Turn on to add extra debugging details to the Job Log.
- Click Save.
Note: When you create a job, Data Integration requires you to immediately add a step before you are allowed to save the job.
Add a step
- In the navigation panel, select Job Definitions.
- Select the appropriate job for the step.
-
Click > Add Step.
Tip: You can re-use an existing step (including its tasks): right-click the step and select Copy; right-click any existing step and select Paste; the copy appears at the bottom of the job's step list.
- Step name: Type a name that is unique within the job. Up to 100 characters.
- Click Save.
Note: When you create a step, Data Integration requires you to immediately add a task before you are allowed to save the step.
Tip: To re-arrange the steps in a job, you can use drag-and-drop.
Add a task
These steps are the same for most agents. If you find any differences between these steps and the agent you are working with, see the agent's own page in this help.
- In the navigation panel, select Job Definitions.
- Select the appropriate job for the task.
-
Click > Add Task.
Tip: You can re-use an existing task: right-click the task and select Copy; right-click any existing task and select Paste; the copy appears at the bottom of the step's task list.
-
Task name: Type a name that is unique within the step. Up to 100 characters.
Note: The parameters that appear under Source and Destination depend on the agents used. For more information, see the pages for your agent types.
-
Under Source, from Connection select the connection that you defined in the setup phase.
-
From Query and Filters select the resources that you defined in the setup phase (if applicable).
Note: You can expose Filters for runtime override.
- Under Destination, from Connection select the connection that you defined in the setup phase.
- Click Save.
Note: You can add multiple tasks within a single step; when the step is run, all the tasks run in parallel. (That's why you can't drag and drop tasks—their order inside the step doesn't matter.)
Tip: If you care about the running order for two or more tasks, put them in separate steps, then order the steps as needed.
Delete a job, step, or task
- In the Job Definitions panel, select the job, step, or task.
-
Click .
Caution: In a job definition, deleting any item deletes all its sub-items as well.
6. Run a job
You have two options for running a job:
- run the job from within Data Integration
- run the job from FP&A or FP&A Plus (in Process Manager you set up and run a Data Integration process)
Run a job from Data Integration
You run a job directly from the Data Integration Job Definitions page.
Typical reasons to use this manual option are because it is convenient or because you want to test a configuration change to the job.
- In the navigation panel, select Job Definitions.
- Select the job.
- Click (located at the top of the Job Definitions panel).
Run a job from FP&A or FP&A Plus
In your application, you can use Process Manager to set up a process that runs your Data Integration job.
You have the choice of running the process manually, or on a schedule.
- Sign in to the application.
- Open Process Manager.
- Select Insert > Data Integration.
- Description: Type a description for the process (optional).
-
From Site select the site for which you defined the job in Data Integration.
Note:If Site does not contain the site you want, it may have been deleted in Data Integration. Similarly, if you save a process but the site is subsequently deleted in Data Integration, in Process Manager the process becomes invalid.
Likewise, if a job is deleted in Data Integration, processes that use the job can no longer run.
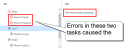
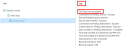
When an existing process can no longer find a site or job, the Site box appears empty and is outlined in red:

- From Job select the job (from Data Integration) that you want this process to run.
- Select File > Save.
-
To run the job now, click .
If you want to run the job on a schedule, to learn how, in the Financial Planning & Analysis online help go to:
General modules > Process Manager and find the section Schedule a process.

7. Monitor jobs
You track and manage your jobs in the Job Log where you do the following:
- See the result status of jobs (Success, Error), or Canceled
- See the percentage completed if the job is still running
- See a list of the job's steps and tasks and view the log for each
- Cancel a running job
Tip: You can also monitor your jobs in Financial Planning & Analysis, using Process Manager's Task Log. For more information, see the Financial Planning & Analysis online help.
Open the Job Log page
- In the navigation panel, click Job Log.
View a job
- To find the job, scroll or click to filter/sort the Job Log.
-
Select the job's row.
The job and its steps and tasks appear in the Job panel.
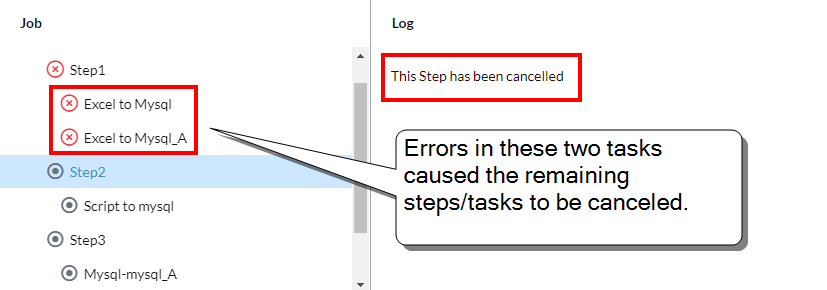
An icon/color indicates each item's result status:
- – Success
- – Error
-
– Canceled
Note:The status Canceled indicates an error occurred in a preceding step/task:
-
To see the details for a job, step, or task, select it.
The details appear in the Log pane:
Tip: The descriptions that you see here are the same ones that appear in the Task Log in Process Manager.

Cancel a running job
Note that you can only cancel a running job (one whose Status is Running).
- In the Job Log select the job's row.
-
In the lip click .
Note: The job may take a few seconds to cancel; you may need to click to see the Status change to Canceled.