On-Premises deployment
This page describes the requirements for deploying Data Integration on-premises, as well as how to install the Controller.
Requirements
Hardware
The DIS Controller requires the following hardware (it can be virtualized):
| Feature | Recommended |
|---|---|
| Operating System | Microsoft Windows Server 2016 or later |
| Nodes | 1 or more |
| RAM | 16 GB |
| CPU | 4 vCPU, 8 core |
| Disk Storage | 100 GB |
Note: Do not install the DIS Controller directly onto your ERP (application or database servers).
Network throughput
The DIS Controller requires connectivity to the Prophix Cloud, as well as any cloud applications that may be used in the integration pipelines created and run in the solution. The recommended network specifications are as follows:
| Feature | Recommended |
|---|---|
| Network in | 2 Mbps or better |
| Network out | 2 Mbps or better |
Network firewall
To communicate with the Prophix Cloud, the Integration Agent uses a combination of HTTPS requests and database connectivity via TCP. For this setup to work, your network firewall must be configured as follows:
| Feature | Required | Consequence |
|---|---|---|
| HTTPS outbound: Port 443 | Yes | Will not function |
| TCP outbound: Port 3306 (Staging DB) | Yes | Will not function |
| TCP outbound: Port 1433 (or another port as specified by the ODBC driver) | Yes, if connecting via SQL or ODBC agent | Will not function |
Outbound access
To ensure the correct operation of Prophix Cloud application functionality, outbound access must be allowed on internal corporate firewalls to the following domains and ports:
| Domain | Ports | Purpose |
|---|---|---|
| *.prophix.cloud | 443 |
Prophix delivers its cloud applications via services from this domain. Note: If more restrictive access is required, you can use the regional subdomain for the location of your instance, which is based on your URL: (for example: *.us1.prophix.cloud or *.eu.prophix.cloud) |
|
443 | Message queue used to coordinate jobs between Data Integration Service Agents and Prophix Cloud instances. |
|
443 | Delivers application updates to Data Integration Service Controllers and Agents. |
| *.rds.prophix.cloud | 3306 | Used by Data Integration Service agents to transfer data from on-premise sources to staging databases used by Prophix Cloud applications. |
| prophix.zendesk.com | 443 | Provides access to Prophix online customer support for logging tickets, and accessing knowledge bases and forums. |
Security and inbound connections
As part of security compliance, Prophix Cloud only accepts inbound connections that match a verified list of IP addresses/ranges.
You must provide Prophix Support with a list of the public IP range(s) that the DIS Controller server will potentially be behind.
CIDR notation is preferred but single static IP addresses are acceptable.
Send the list to your contact at Prophix Support.
Install Prophix DIS
The following procedure is for brand-new installations of Prophix Data Integration Service. You can start to install once Prophix Support provides the installation package.
Note: Within the installation package the file name for the ZIP file changes with each revision. The procedure below uses the file name current at the time of writing (1.2022.1107.3) but the one you receive may be different.
- Download the installer package (using the link provided by Prophix Support).
-
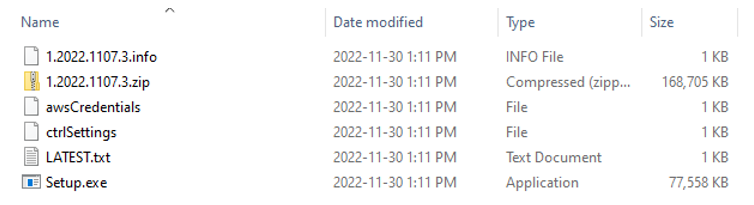
Load the files to the location of your choice:
Note: Do not unzip 1.2022.1107.3.zip.
-
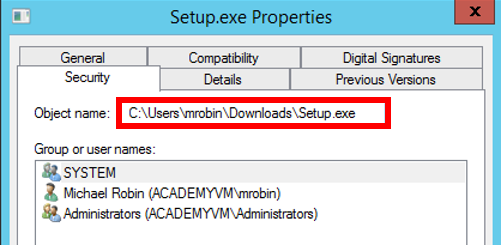
Right-click Setup.exe and go to Properties > Security and note the file's full path; for example:
-
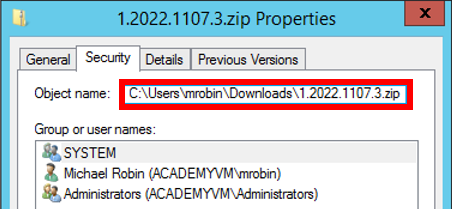
Right-click 1.2022.1107.3.zip and go to Properties > Security and note the file's full path; for example:
-
Open a text editor and copy/paste the following:
<path from step 3> --action Install --package <path from step 4>
- Replace <path from step 3> with the path you recorded for Setup.exe.
- Replace <path from step 4> with the path you recorded for 1.2022.1107.3.zip.
-
Optional: To use a service account, add the following parameters at the end of the command, replacing username and password with your username and password. (Note that username should be in the form of domain\user.)
--service-username username --service-user-password password
-
Open Command Prompt as an Administrator and copy/paste the command you prepared above; for example:

-
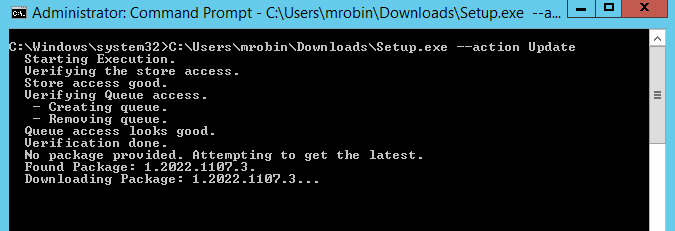
Click Enter; the command runs; for example:

-
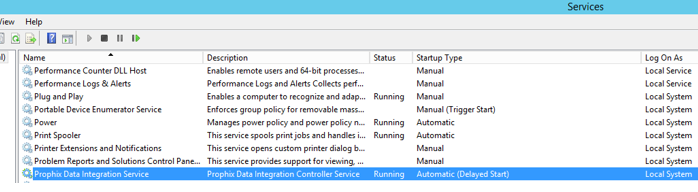
Open Services and confirm that the Prophix Data Integration Service is running:
-
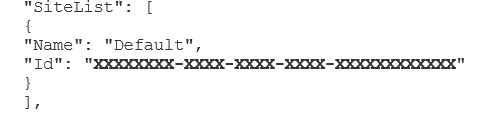
Open Guids.JSON (located at C:\Program Files\Prophix\DataIntegration\1.2022.XXX.1\Controller) in your text editor.
-
Note the Site ID (located in the SiteList section as Id):
(You will need the Site ID below, when you add a site.)
Manually update DIS
The following procedure updates an existing installation of Prophix Data Integration Service.
Note: If you have enabled automatic updates, there is no need to perform a manual update. For more information, contact Prophix Support.
You can start to update once Prophix Support provides the installation package.
Note: Within the installation package the file name for the ZIP file changes with each revision. The procedure below uses the file name current at the time of writing (1.2022.1107.3) but the one you receive may be different.
- Download the installer package (using the link provided by Prophix Support).
-
Load the files to the location of your choice:
Note: Do not unzip 1.2022.1107.3.zip.
-
Right-click Setup.exe and go to Properties > Security and note the file's full path; for example:
-
Open a text editor and copy/paste the following:
<path from step 3> --action Update
- Replace <path from step 3> with the path you recorded for Setup.exe.
-
Open Command Prompt as an Administrator and copy/paste the command you prepared above; for example:

-
Click Enter; the command runs; for example:
-
If you want to confirm the version number, run this command:
<path from step 3> --action version
For example:
Install the Controller
Caution: Do not install the Controller on your ERP. The Controller instance should be able to connect to the ERP, but from a separate physical or virtual machine.
- Contact Prophix Support; they will send you the necessary files and instructions.
- Install the files as directed.
- Notify Prophix Support; they will verify that the Controller is set up correctly.
Note: You now have a GUIDs.json file. See the following section to learn why this is important.
About GUIDs and sites
A GUID (Globally Unique Identifier) is a 36-character string that serves as a guaranteed unique digital ID.
To set up sites in Data Integration, you need to provide your Controller's GUID, which is stored in the GUIDS.json file that was created on your ERP server when you installed the Controller (see the previous section).
Example GUIDS.json file, with the Controller GUIDs outlined in red (note that these two GUIDs are always identical):

In Data Integration, to add a Site resource, you copy either of the Controller GUIDs that appear in GUIDS.json and paste the string into the Site ID box.