Sage Intacct agent (legacy)
A Sage Intacct agent can only be used as a source and can connect to the following destinations:
- Excel
- MySQL
- ODBC/ODBC32
- SQL Server
- Text
Integrating Sage Intacct
This section describes steps required to integrate Sage Intacct with Financial Planning & Analysis.
Sage Intacct users must perform the procedures in this section before any other steps in the Data Integration workflow.
Also note that these integration steps are required whether your Sage Intacct data source is located on-premises or in the cloud.
Create Sage Intacct user credentials
Use the steps below to set up a Web Services User in Sage Intacct with Full Read Access permissions to the General Ledger and the Company Module.
- Sign in to the Sage Intacct site as an administrator.
- Select Company > Admin > Web Service User and click New.
- Complete all the boxes; for user type, select Business.
- Turn off Admin privileges.
- Send Prophix the user name, company code, and temporary password.
Enable Sage Intacct web services authorization access
Use the steps below to allow Sage Intacct web services authorization access.
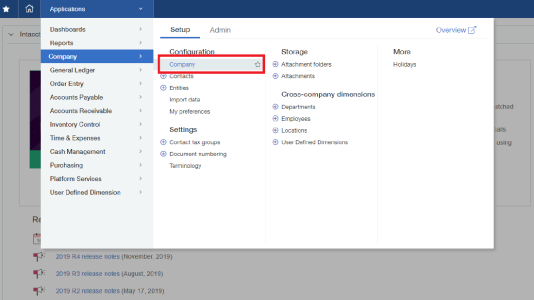
- Sign in to the Sage Intacct site.
-
From Applications, select Company > Company:
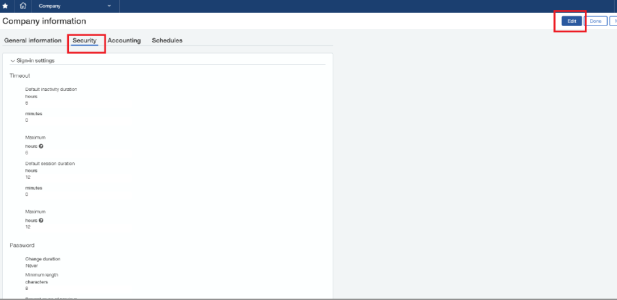
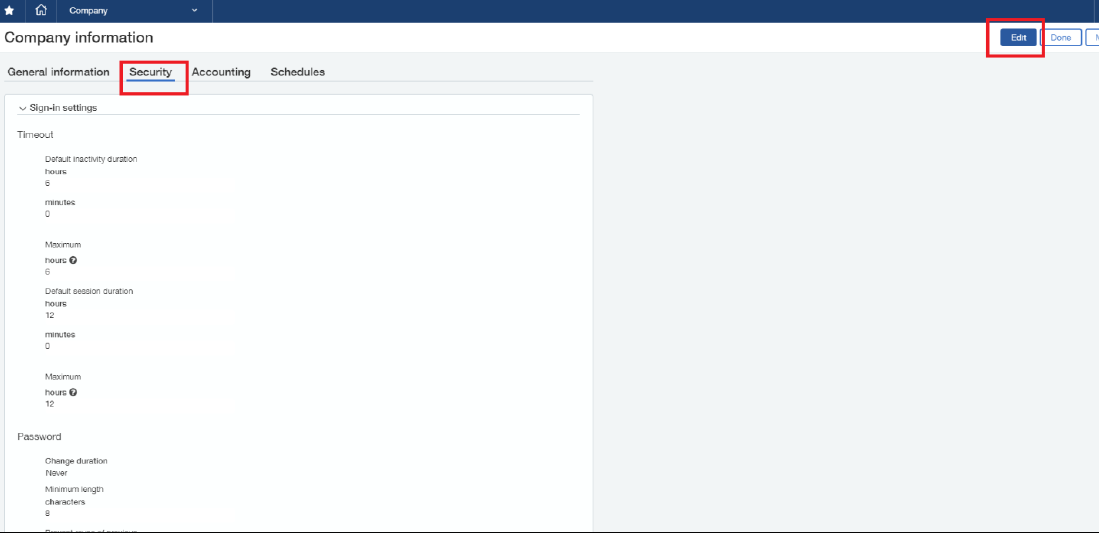
-
Select the Security tab and click Edit:
- Scroll to Web Services Authorizations.
-
Click Add:
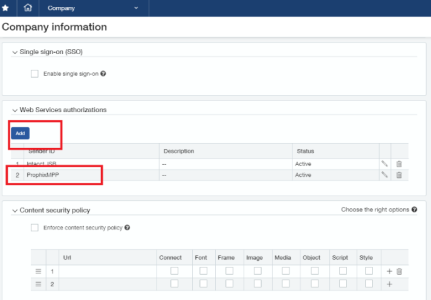
- Type ProphixMPP.
- Click Save.


Add a connection
To add a connection for a Sage Intacct agent:
- In the navigation panel, select Admin Setup.
- Select a text agent or peer connection, and click > Add Connection.
- Connection Name must be unique. Up to 40 characters.
- Connection Method: Default is Cloud DSN; if Standard is selected, the following appear:
- Username: Up to 32 characters.
- Password: Up to 32 characters.
- Host Name: Up to 256 characters.
- Port: Up to 5 digits; an unsigned integer from 1 to 65535. Default is 3306.
- Database: Up to 64 characters.
- Use SSL: Off by default. Turn on to require SSL mode.
- Click OK.
Add a SQL query
You can add either a standard Sage Intacct query or a Sage Intacct Custom query.
To add a standard Sage Intacct query
To add a query to a Sage Intacct connection:
- In the navigation panel, select Setup.
- Select a SQL connection or peer query, and click > Add Query.
- Query Name must be unique. Up to 40 characters.
- Select the Object that you want to query:
- APBill
- GLAccountBalance
- GLDetail
- GLEntry
-
To select the fields from the object that you want in the query, click .
The Fields Selector opens.
- Move the fields you want included into the right-side list, and click OK.
-
To define the query, click . The Query Builder opens.
- To add a filter statement for the query, in each row:
- Select a Field.
- Select an Operator.
- Type a Value.
- Add parentheses as needed.
Add a Join if needed.
In Value, if you use a text value you must enclose it in single quotes; for example, CURRENCY = 'USD'.
- To allow users to input their own values in the Data Integration process, add parameters to the query:
In the Value column identify the parameter by prepending it with @; for example, @period. :
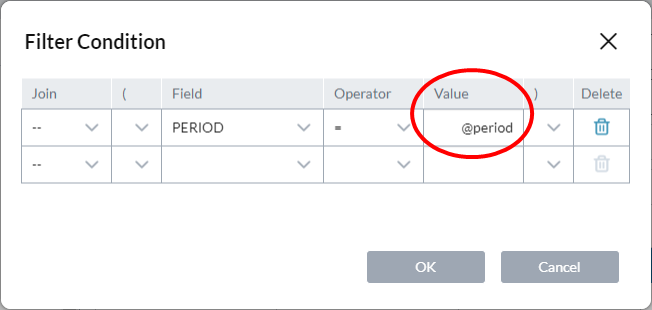
- If using the Like operator, enclose your parmeter in % signs; for example %AccountTitle%.
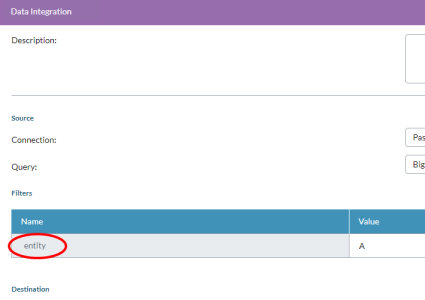
In the query, in the Filters table, you add the parameter to Name, select a Type, add a Default value, and optionally, a Sample value.
In the Filters table, if using a text value, do not enclose your default or sample values in quotes. (The quotes are unnecessary because you have already specified the Type as Text.)
Later in the Data Integration process, the query will show the user the entity placeholder, to be typed over with a filter value:
- Click OK.

To add a custom Sage Intacct query
To add a query to a Sage Intacct connection:
- In the navigation panel, select Setup.
- Select a SQL connection or peer query, and click > Add Query.
- Query Name must be unique. Up to 40 characters.
-
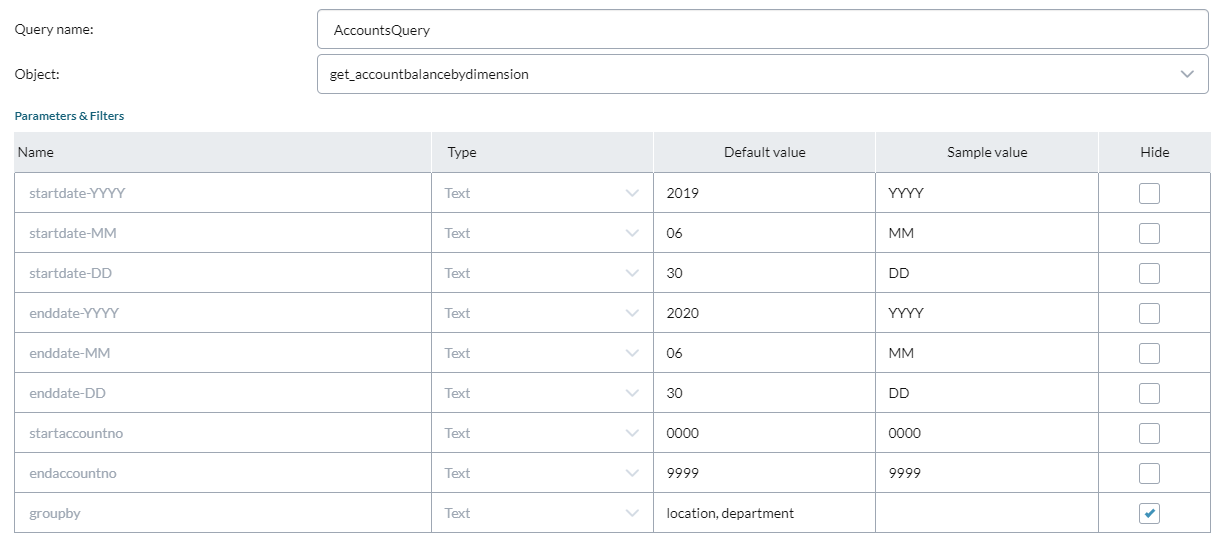
From Objectselect : get_accountbalancebydimension.
The Parameters & filters table appears and contains a set of static rows that contain a SQL query for Sage Intacct.
The query is structured as follows:
- The first three rows together make up the Starting date.
- The second three rows together make up the Ending date.
- The seventh row is the starting Account Number.
- The eighth row is the ending Account Number.
- The last row is for the Group By parameters.
Note the following:
- All rows are required.
- Name and Type: read-only.
- Default value: In the Data Integration process, users can accept the default or replace it with their own (up to 50 characters; special characters allowed.Sample value: In the Data Integration process, what the user sees when hovering over the cell in the Value column; up to 50 characters.
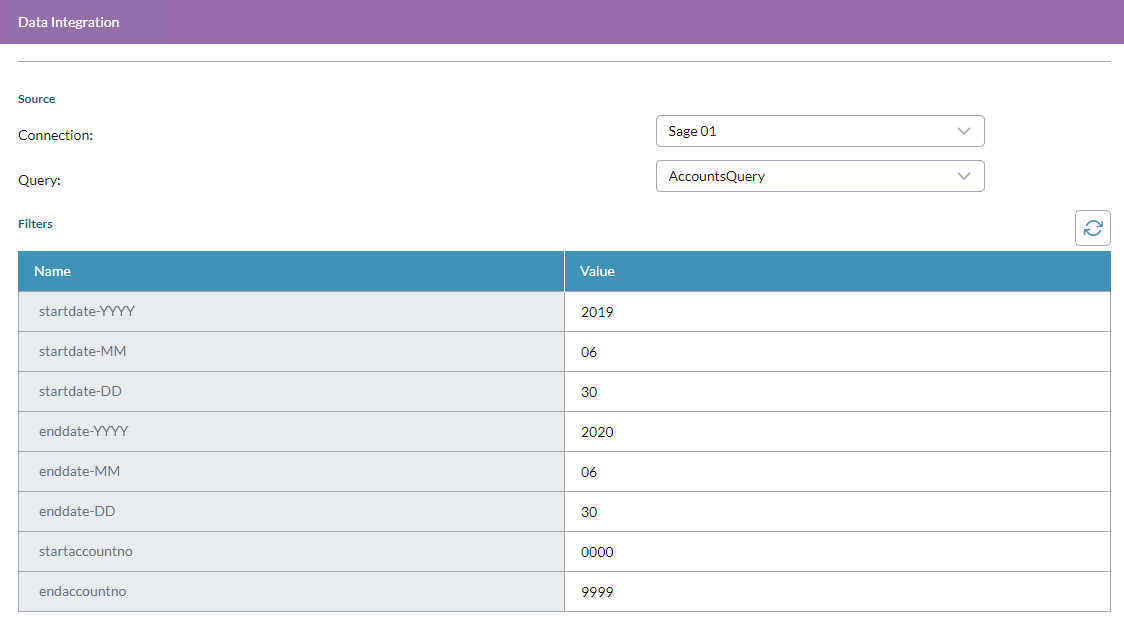
Example of a completed query:
In the Data Integration process the same query appears as follows:

- Click OK.
Known issues
In the Filter Condition dialog, If you use the like operator, then in the Filters table Type must be set to Numeric, otherwise the job fails to run and returns the Returned column names are empty error.
For example, when using the filter condition ACCOUNTTITLE like ‘%@AccountTitle%’:

In the Filters table, for AccountTitle you must set Type to Numeric:
