SQL Server agent
A SQL Server agent can be used as a source and can serve as a destination for:
- Excel
- MySQL
- ODBC/ODBC32
- SQL Server
- Text
A SQL Server agent can support the following sources:
- SQL Server 2019
- SQL Server 2017
- SQL Server 2016
- SQL Server 2014
- SQL Server 2012
- SQL Server 2008 R2
Add a connection
To add a connection for a SQL Server agent:
- In the navigation panel, select Admin Setup.
- Select a SQL Server agent or peer connection, and click > Add Connection.
- Connection Name must be unique. Up to 40 characters.
- Authentication: Windows or SQL.
- For SQL Authentication, the Username and Password: Up to 128 characters.
- Server and Database: Up to 128 characters.
- SSL: On by default. Turns on SSL mode requirement.
- Click OK.
Add a SQL query
- Select a SQL connection or peer query, and click > Add Query.
- Query Name must be unique. Up to 40 characters.
-
In Query, type or paste your ERP query.
Note: The SQL must be compatible with your ERP.
Example of a query with parameters:
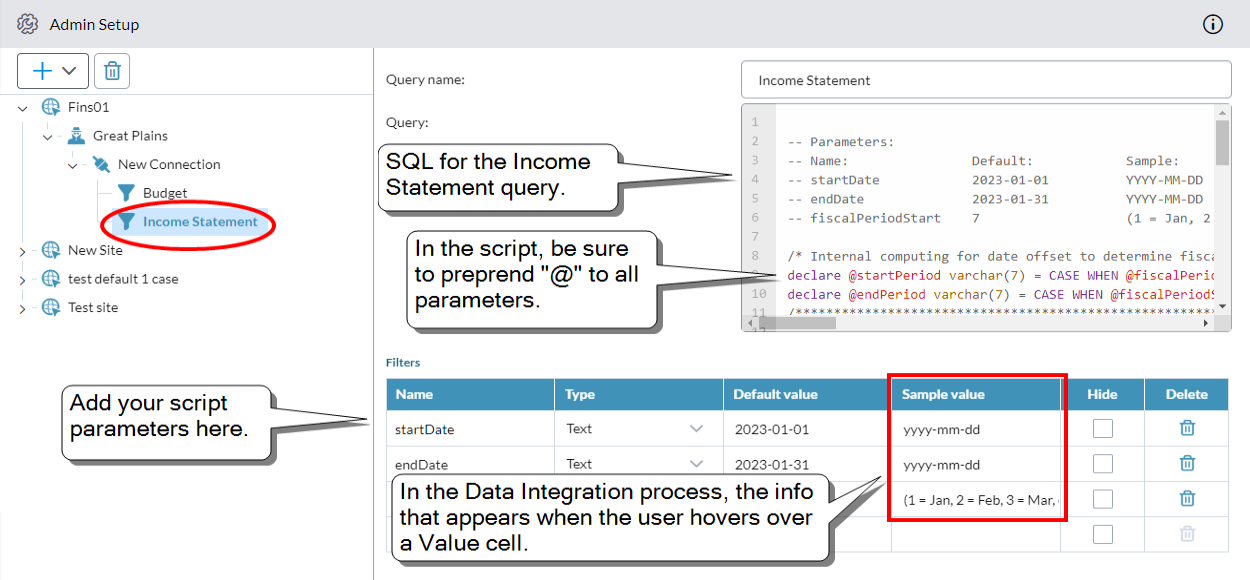
Note: Within the body of your SQL script, you must preprend @ to all parameters. For example, startDate must appear as @startDate.
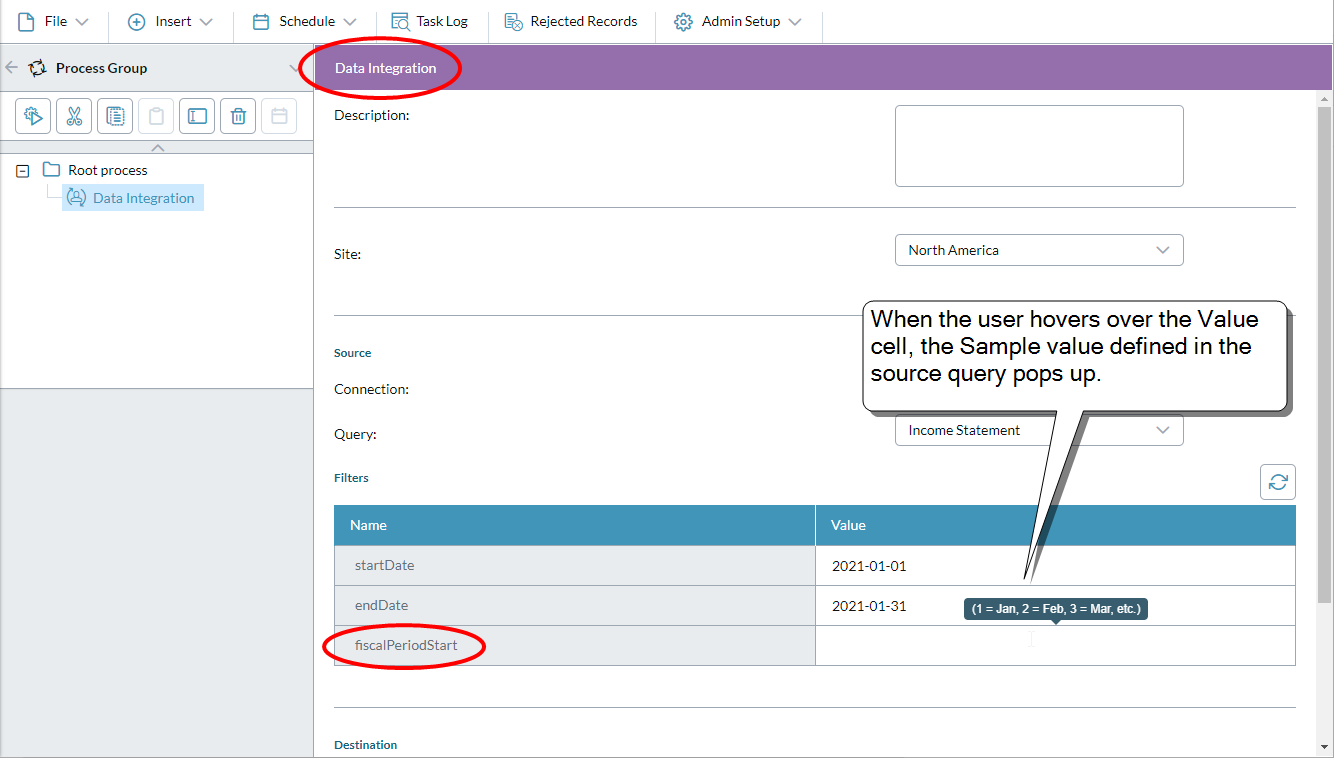
The same query viewed in the Data Integration process:
- If the query has parameters, add them to the Filters table:
Name: The parameter name. Up to 50 characters.
Tip: In the filter table, don't prepend "@" to the parameter names.
- Type: The parameter's data type (text or numeric). (For date values choose text.)
- Default value: What the user sees in the Data Integration process and can edit. Up to 50 characters.
- Sample value: What the user sees when hovering over the cell in the Data Integration process. Use it to show the expected input/format. Up to 50 characters.
- Hide: Turn on if you want to keep users of the Data Integration process from seeing the parameter, while using its Default value in the query.
- Click Save.