Sage Intacct agent
The Sage Intacct agent securely connects to your account and retrieves General Ledger data for reporting and analysis, and is able to adapt quickly to changes in the the Sage Intacct API.
Note: When using Drill Across or Custom Query operations, the system automatically retrieves metadata from Sage. This means that even if column names are not specified in the query, the system will include a predefined set of columns based on the Sage instance being used.
A Sage Intacct agent can only be used as a source and can connect to the following destinations:
- Excel
- MySQL
- ODBC/ODBC32
- SQL Server
- Text
Note: The existing Sage Intacct agent has been renamed Sage Intacct (Legacy) and is available for purposes of backwards compatibility; however, the new Sage Intacct agent should now be used.
Integrating Sage Intacct
This section describes steps required to integrate Sage Intacct with Financial Planning & Analysis.
Sage Intacct users must perform the procedures in this section before any other steps in the Data Integration workflow.
Also note that these integration steps are required whether your Sage Intacct data source is located on-premises or in the cloud.
Create Sage Intacct user credentials
Use the steps below to set up a Web Services User in Sage Intacct with Full Read Access permissions to the General Ledger and the Company Module.
- Sign in to the Sage Intacct site as an administrator.
- Select Company > Admin > Web Service User and click New.
- Complete all the boxes; for user type, select Business.
- Turn off Admin privileges.
- Send Prophix the user name, company code, and temporary password.
Enable Sage Intacct web services authorization access
Use the steps below to allow Sage Intacct web services authorization access.
- Sign in to the Sage Intacct site.
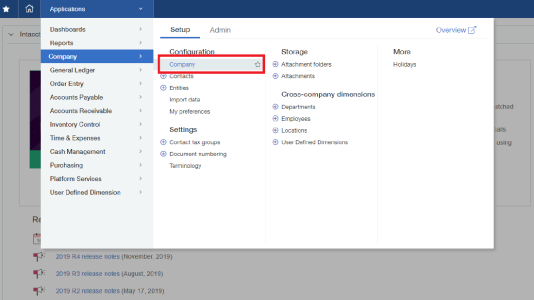
-
From Applications, select Company > Company:
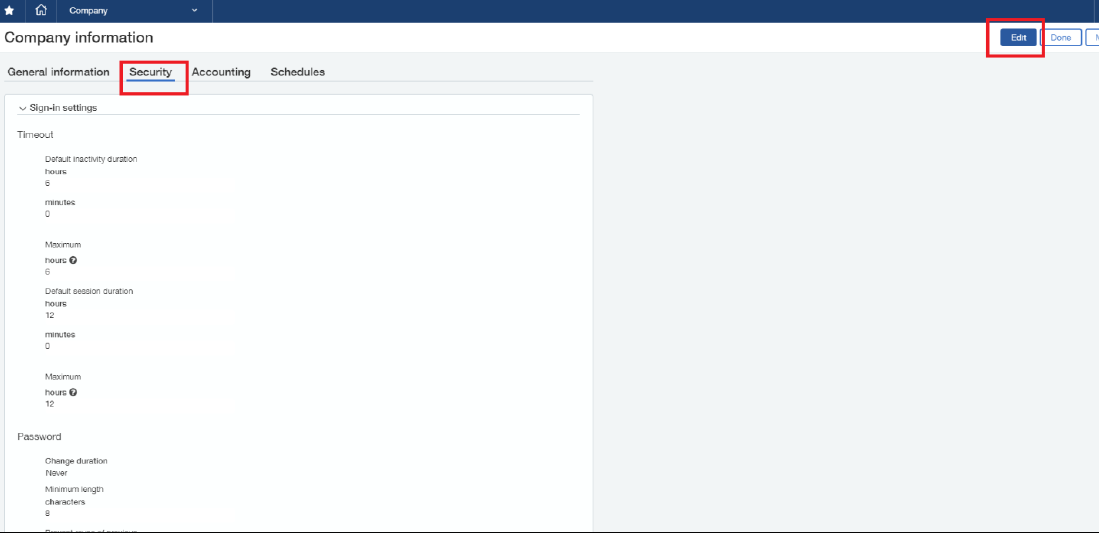
-
Select the Security tab and click Edit:
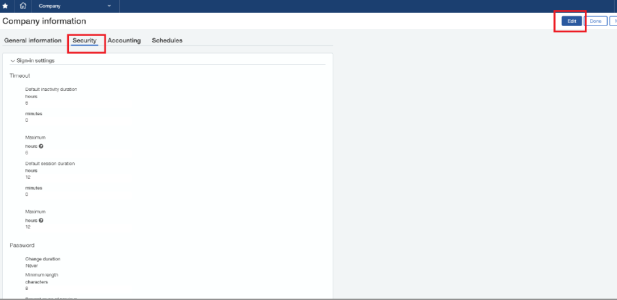
- Scroll to Web Services Authorizations.
-
Click Add:
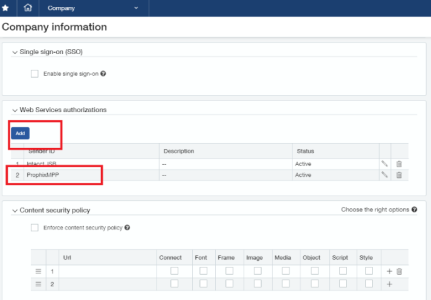
- Type ProphixMPP.
- Click Save.


Add a connection
To add a connection for a Sage Intacct agent:
- In the navigation panel, select Admin Setup.
- Select a text agent or peer connection, and click > Add Connection.
-
Connection Name must be unique. Up to 40 characters.
Note: All the parameters listed below are required; none have character restrictions.
-
If there is more than one version of the agent, from Version select the version that you want to use.
- Endpoint URL: The endpoint URL provided by Sage Intacct.
- Sender ID: The identifier provided by Sage Intacct that tells your system what external application is connecting. (Filled in automatically).
- Sender Password: The password provided by Sage Intacct used together with the Sender ID to securely allow your application to connect. (Filled in automatically).
- User ID: Up to 32 characters.
- User Password: Up to 32 characters.
- Company ID: Up to 32 characters.
- Click Save.
Add a query
- Select a Sage Intacct connection or peer query, and click > Add Query.
- Query Name must be unique. Up to 40 characters.
- The option you choose from Query Type determines the parameters on the Filters table.
- In the Filters table, complete the following:
Name: The parameter name. Up to 50 characters.
Tip: In the filter table, don't prepend "@" to the parameter names.
- Type: The parameter's data type (text or numeric). (For date values choose text.)
- Default value: What the user sees in the Data Integration process and can edit. Up to 50 characters.
- Sample value: What the user sees when hovering over the cell in the Data Integration process. Use it to show the expected input/format. Up to 50 characters.
- Hide: Turn on if you want to keep users of the Data Integration process from seeing the parameter, while using its Default value in the query.
- Click Save.